

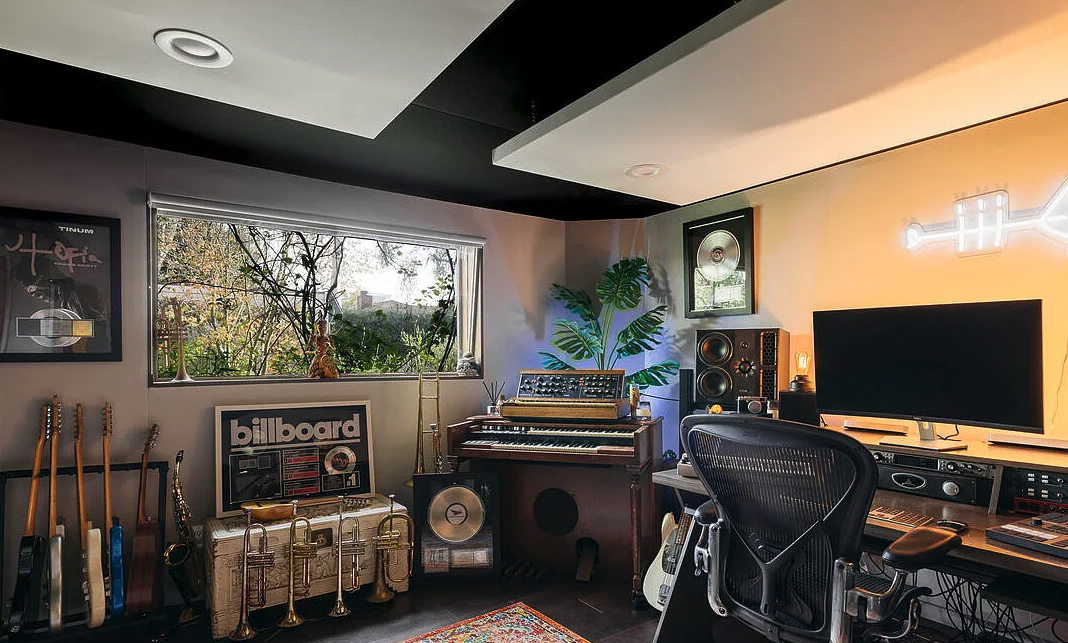
Whether you’re recording vocals for your next single, producing podcasts, streaming, or building a serious home studio, one thing becomes obvious pretty quickly: expensive microphones and studio monitors can only take you so far.
If the room itself sounds bad, your recordings will too.
Many people assume that upgrading their gear is the fastest way to improve audio quality. In reality, the room has just as much influence as the equipment. Reflections, flutter echoes, standing waves, and excessive reverberation can make even premium microphones capture muddy or inaccurate sound.
The good news? You don’t need to build a commercial recording studio to achieve professional results. With thoughtful room planning and high-quality acoustic treatment, it’s possible to create a recording space that lets your equipment perform at its full potential.
Start With the Room, Not the Gear
A common mistake when upgrading a home studio is spending thousands on microphones, interfaces, and monitors while overlooking the room itself.
Sound doesn’t travel directly from your voice or speakers to your ears. It also bounces off walls, ceilings, floors, windows, and furniture before reaching the microphone. Those reflections combine with the original sound, creating coloration that can make recordings difficult to mix accurately.
The Audio Engineering Society (AES) has long emphasized that room acoustics are one of the most important factors in achieving accurate monitoring and recording. Professional studios devote significant attention to acoustic design because even world-class equipment can’t compensate for an untreated environment.
Before thinking about upgrading your microphone, ask yourself one question:
Does my room actually let me hear what’s really there?
If the answer is no, improving the acoustics will almost always provide a more noticeable improvement than buying another piece of equipment.
Acoustic Treatment Isn’t the Same as Soundproofing
These two terms are often used interchangeably, but they solve completely different problems.
Soundproofing is about preventing sound from entering or leaving a room. It typically requires structural construction techniques such as additional wall mass, decoupling, specialized insulation, acoustic doors, and sound-rated windows.
Acoustic treatment, on the other hand, improves how sound behaves inside the room. Its purpose is to reduce unwanted reflections, control reverberation, improve clarity, and create a more balanced listening environment.
This distinction is especially important for home studios. If your goal is producing cleaner recordings or making better mixing decisions, acoustic treatment is usually the first investment to make.
For a deeper explanation of the differences, read this article.
Choosing the Right Room
Not everyone has the luxury of designing a dedicated recording room from scratch, but choosing the right space can save a lot of work later.
In general, rooms with fewer large windows and doors are easier to treat acoustically because glass reflects sound very efficiently. Likewise, extremely open floor plans tend to create less predictable reflections than enclosed rooms.
That doesn’t mean basements or spare bedrooms are poor choices. In fact, many excellent home studios begin in spaces that aren’t acoustically ideal.
A basement, for example, may naturally feel “dead” in some frequencies while exaggerating others because of concrete surfaces and room dimensions. With the right acoustic treatment, however, these spaces often become outstanding recording environments thanks to their isolation from household activity and outside noise.
The goal isn’t finding the perfect room.
It’s making your room work as well as it can.
Why Professional Acoustic Panels Make Such a Difference
Not all acoustic panels perform equally.
When comparing products, one specification deserves particular attention: the Noise Reduction Coefficient (NRC).
According to the ASTM C423 testing standard, the NRC is a single-number rating that represents the average sound absorption performance of a material at four key frequencies (250, 500, 1,000, and 2,000 Hz). In simple terms, the closer the rating is to 1.0, the more sound energy the material absorbs instead of reflecting back into the room.
This is one reason professional acoustic panels differ significantly from decorative wall products or inexpensive alternatives. High-performance acoustic panels use carefully engineered core materials, appropriate thickness, and acoustically transparent fabrics to provide predictable, measurable performance.
Focus on the First Reflection Points
One of the biggest improvements you can make doesn’t require covering every wall.
Instead, start with the first reflection points. These are the surfaces where sound from your monitors first bounces before reaching your ears. Treating these locations dramatically improves stereo imaging, vocal intelligibility, and mixing accuracy.
The same principle applies when recording vocals. Reducing early reflections around the performer helps capture a cleaner, more natural signal while minimizing the “boxy” sound that’s common in untreated rooms.
Professional recording spaces typically combine wall panels, ceiling treatment, and bass management rather than relying on a single product. Each element addresses a different part of the frequency spectrum, creating a room that feels balanced instead of unnaturally “dead.”
Don’t Forget the Low Frequencies
If you’ve ever listened to a recording that sounded “boomy” or noticed that bass notes seem much louder in one part of the room than another, you’ve experienced one of the biggest challenges in small studios: low-frequency buildup.
Bass waves are much longer than high frequencies, which makes them harder to control. Instead of simply bouncing off walls, they collect in corners and along room boundaries, creating peaks and nulls that make it difficult to hear an accurate mix.
That’s why professional studios almost always include bass traps in addition to wall panels. Corner-mounted treatments absorb excess low-frequency energy, helping create a more balanced listening environment across the entire frequency range.
The result isn’t just better bass. Vocals become clearer, instruments separate more naturally, and mixes translate more consistently to headphones, cars, and other playback systems.
Don’t Overlook the Ceiling
Walls usually get most of the attention, but the ceiling is another major reflective surface.
In many home studios, early reflections arrive from above just as quickly as they do from the side walls. Installing suspended acoustic ceiling panels, often called acoustic clouds, helps reduce these reflections and improves overall clarity without changing the room’s appearance dramatically.
This becomes especially valuable if you’re recording vocals, acoustic instruments, podcasts, or voice-over work, where intelligibility is everything.
Speaker & Microphone Placement Matter More than You Think
Even a well-treated room won’t perform at its best if your equipment isn’t positioned correctly.
For mixing, a good starting point is to place your studio monitors and listening position in an equilateral triangle, with the speakers aimed directly toward your ears. Keeping monitors slightly away from walls also helps reduce unwanted bass buildup.
The Shure Home Studio Guide recommends paying attention to microphone placement as well. Small adjustments of just a few inches can noticeably change the balance between the direct sound and room reflections, especially when recording vocals or acoustic instruments.
Experimenting with placement before reaching for EQ often produces better results than trying to “fix” problems later during mixing.
Less Is Often More
One misconception about acoustic treatment is that every wall should be covered with absorption.
In reality, an overly treated room can feel unnaturally lifeless. The goal isn’t to eliminate every reflection. It’s to control the reflections that interfere with accurate monitoring and clean recordings while preserving a natural sense of space.
Professional studio design typically combines absorption with careful room layout rather than treating every available surface.
Quality matters here as well. Well-designed acoustic panels provide predictable performance across important frequency ranges, allowing you to use fewer panels more effectively.
Common Home Studio Mistakes
Many recording enthusiasts make the same mistakes when upgrading their space:
- Buying new microphones before addressing room acoustics.
- Choosing decorative wall products that offer little measurable acoustic performance.
- Ignoring low-frequency control and focusing only on mid and high frequencies.
- Positioning monitors directly against walls or in room corners.
- Judging mixes based on a room that colors what they’re hearing.
Avoiding these issues can save both time and money while producing noticeably better recordings.
Build a Room You Can Trust
One of the biggest advantages of proper acoustic treatment isn’t simply producing cleaner recordings.
It’s confidence.
When your room accurately reproduces what you’re hearing, mixing decisions become easier. You spend less time second-guessing EQ moves, fewer revisions are needed, and your projects translate more consistently across headphones, car stereos, home speakers, and streaming platforms.
Whether you’re producing music professionally, recording a podcast, streaming content, or simply building the home studio you’ve always wanted, investing in the room itself often delivers the greatest improvement per dollar spent.
Better Sound designs professional acoustic solutions for studios, home theaters, offices, educational facilities, and commercial environments where sound quality matters. Every product is engineered to provide reliable acoustic performance while complementing the look of the space.
Explore the full range of professional acoustic panels and treatment solutions and start building a recording space that lets your creativity—not your room—shape the final sound.